When using a tool like HubSpot, chances are your account needs multiple users to be successful. Marketers need access to the landing page and email configuration tools, management needs to run reports, and sales people want to access prospect information.

Fortunately, HubSpot accommodates anyone who needs more than one user and different types of users. Here are the steps for adding a user, and what you need to know about the levels of permission.
SEE ALSO: How to Use Hubspot Messages
How to Add Users to Your HubSpot Account
The technical process of adding new users is simple, and will take you less than 2 minutes:
- Log into HubSpot: https://app.hubspot.com/login/
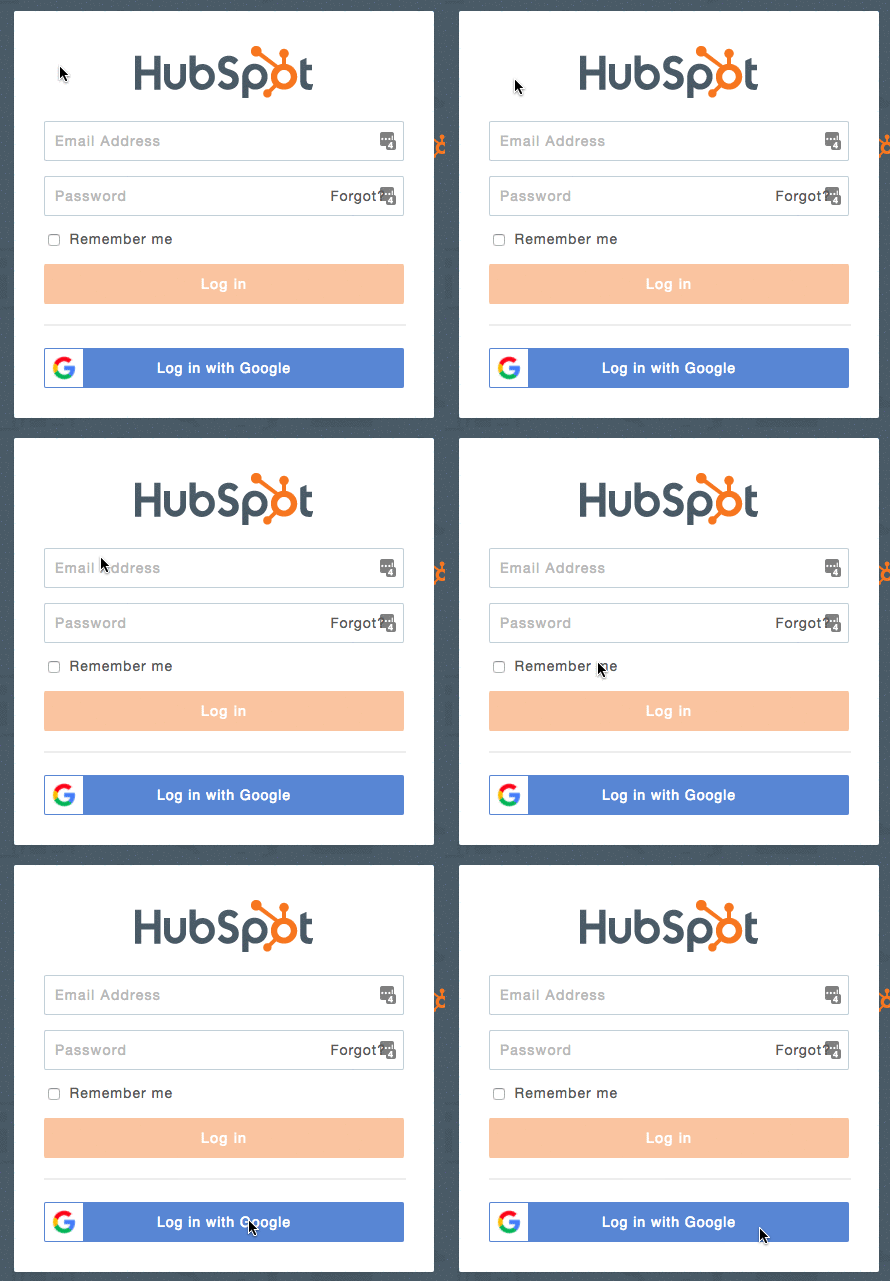
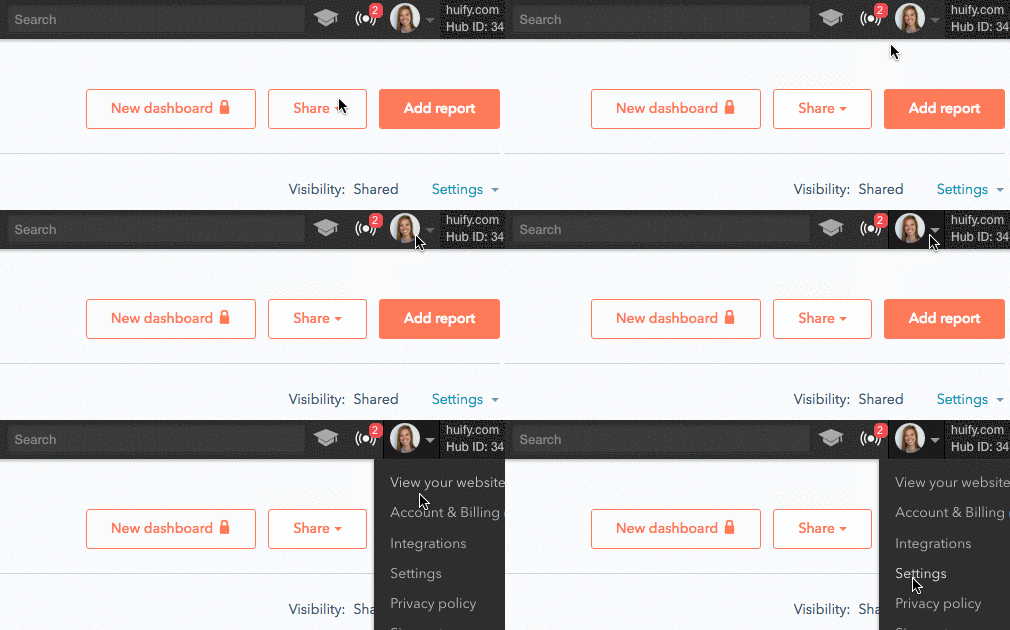
- Navigate to your Account Menu by clicking on the down-facing arrow next to your profile image
- Click on settings
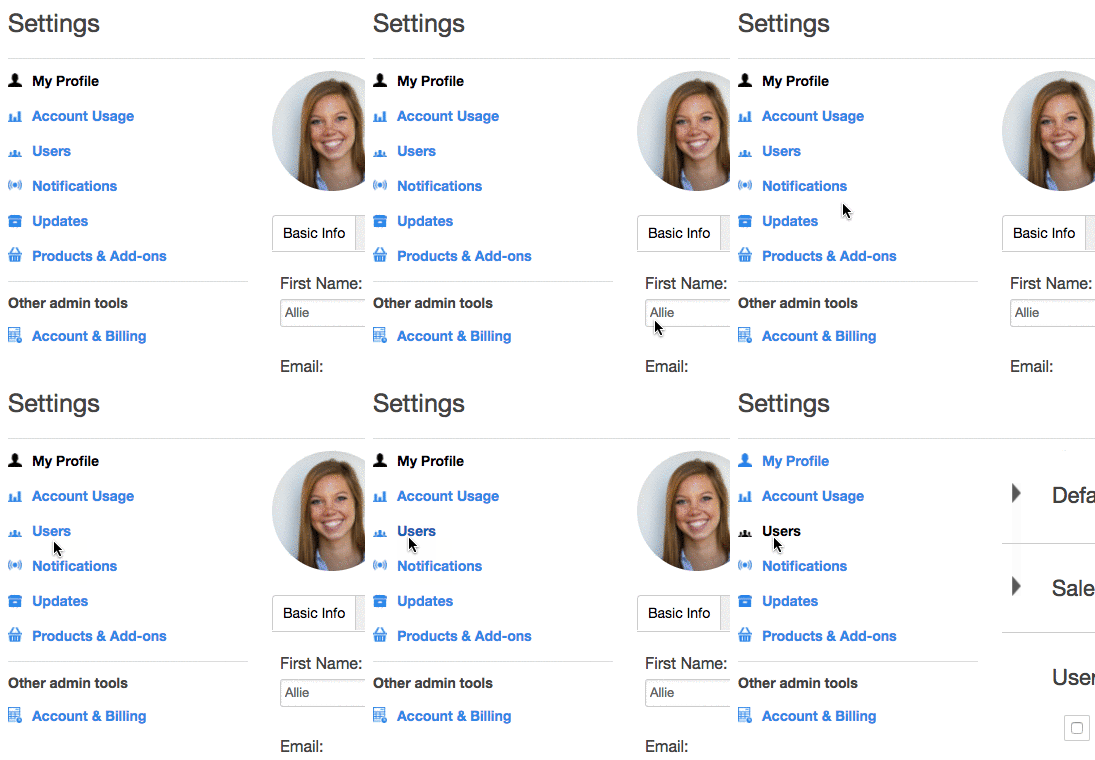
- Click on 'Users' on the left-hand navigation
- Click the blue 'Add User' button on the right side of your screen
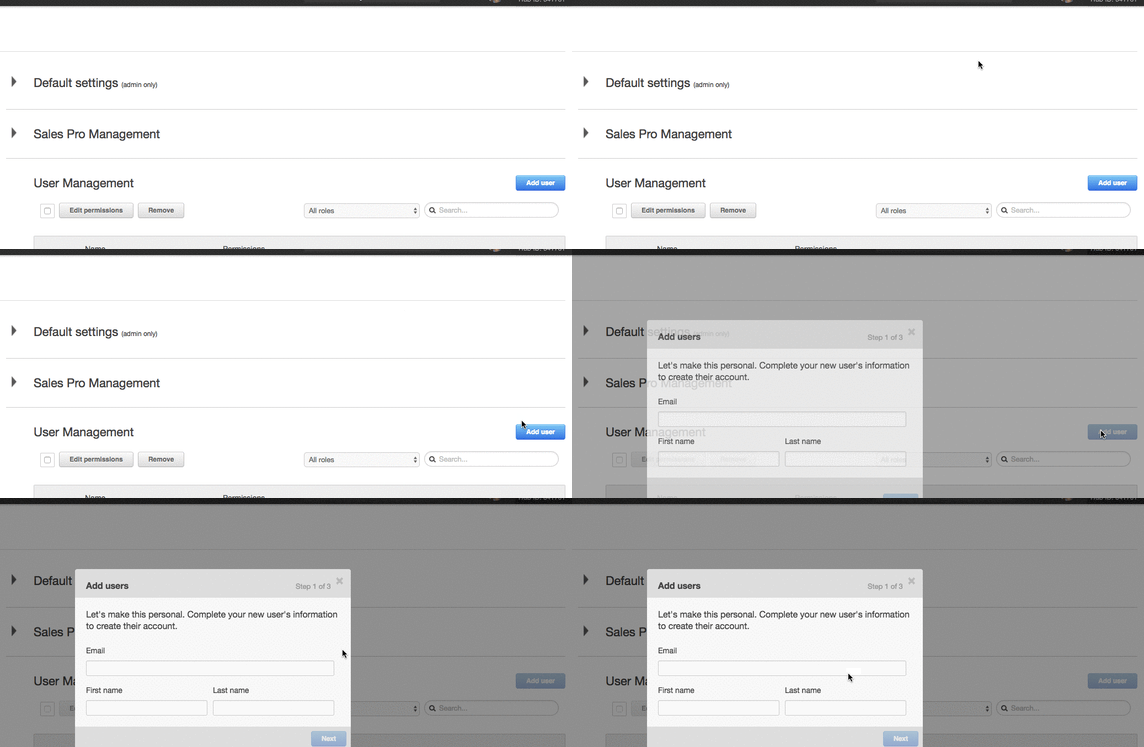
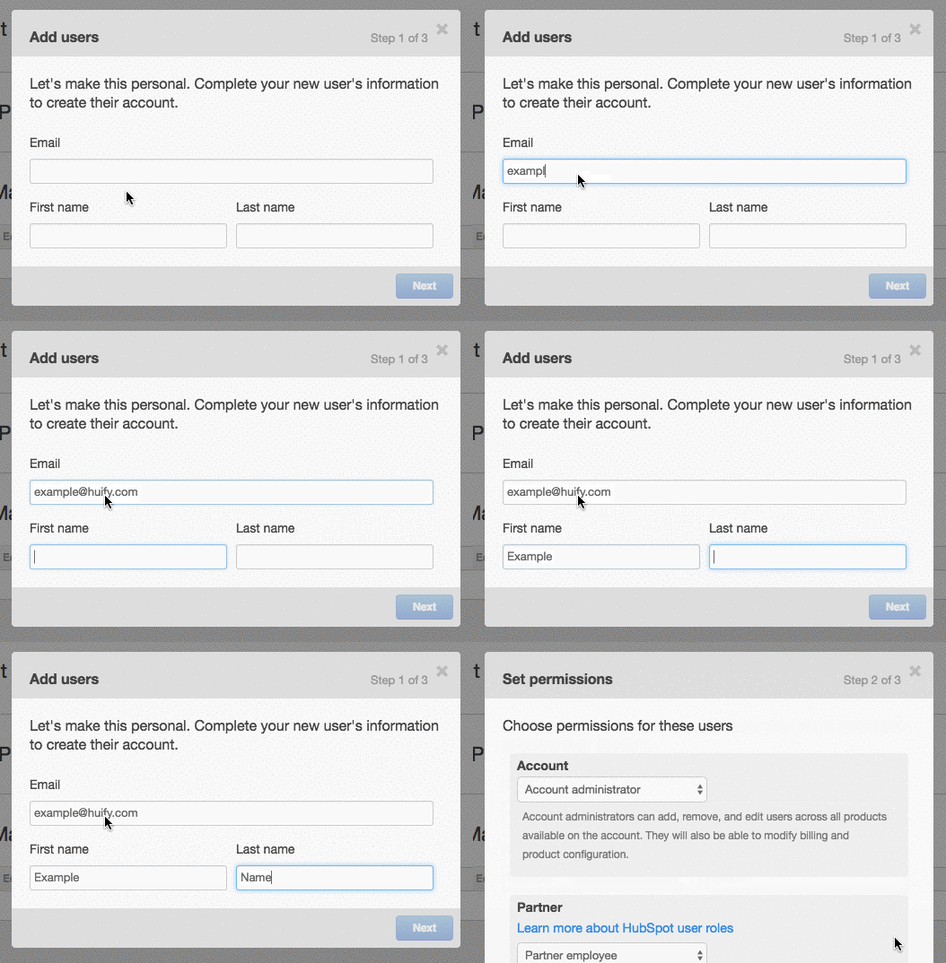
- Enter user information, including name and email address
- Choose the user role by picking specific permissions
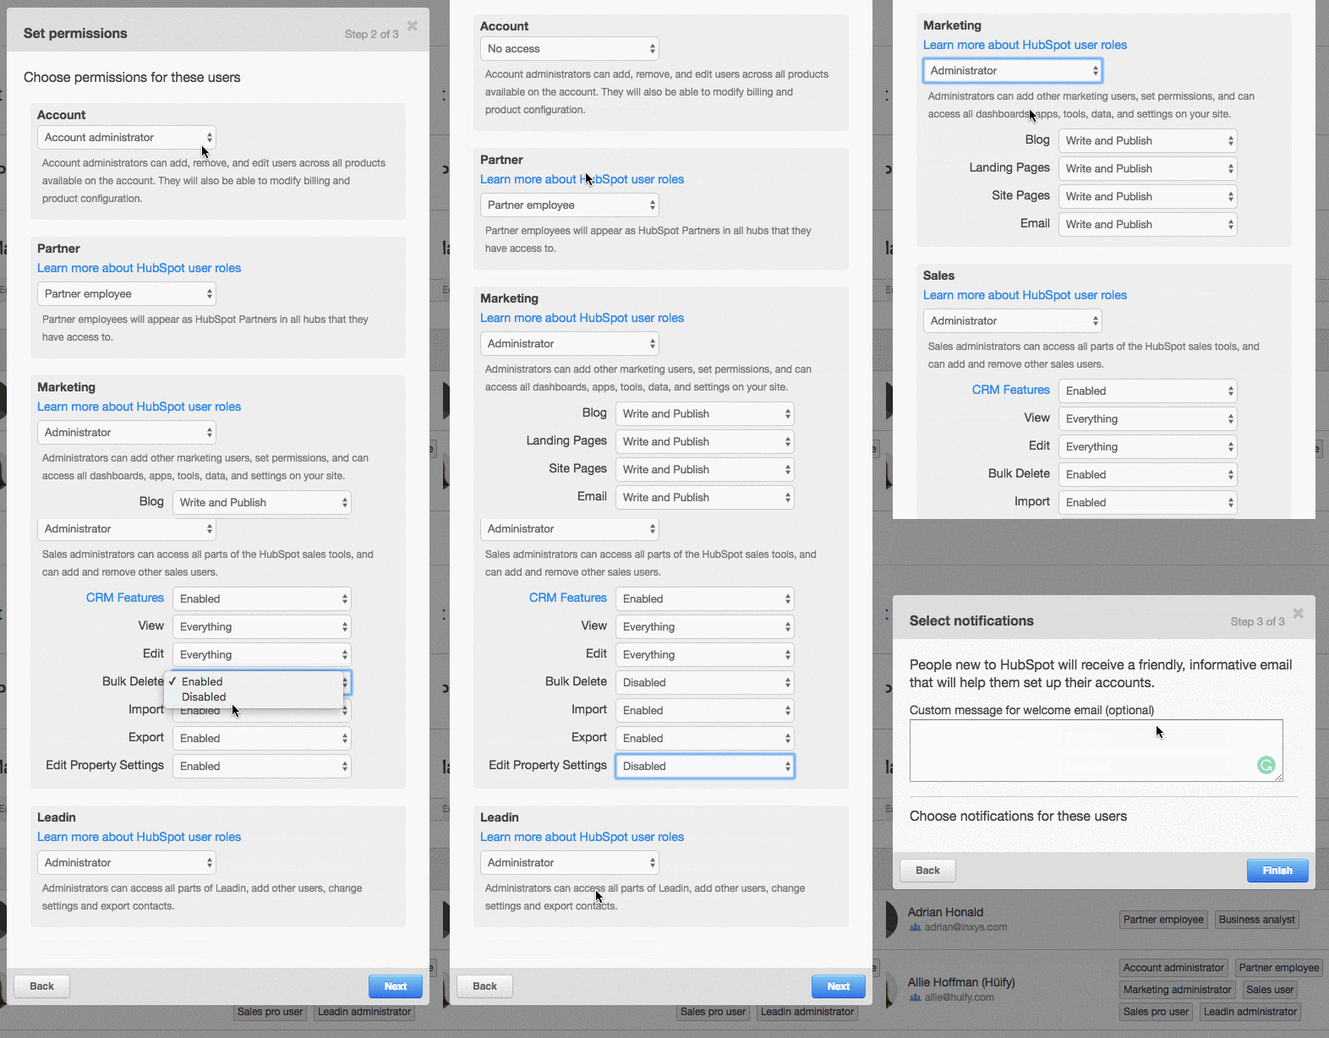
- Select 'Send Welcome Email', and click on the blue Finish button.

As you go through these steps, it's important to keep a few factors in mind to optimize the process for your business:
1. Streamline the Process
The process described by HubSpot is simple, and it's tempting to give everyone administrator access to make things easy. However, it makes more sense to streamline the process, designating a few key people in HubSpot to take care of managing users an defining the roles of others.
As we'll outline below, adding users requires understanding and setting both user roles and permissions levels. Managing the process through the the main people who will be managing your HubSpot account will help you keep track of who can access what, and how the roles are defined amongst team members.
2. Understanding Marketing User Roles
HubSpot offers 6 different types of user roles, all of which have distinct uses and permissions:
- Administrators can access every part of the software. Your marketing agency, IT team, software, and marketing managers should all have this user role.
- Marketers have the same access as administrators, with one exception: they cannot add new users. The name can be misleading; you might not want all of your marketing team to make system changes in the software.
- Content Creators have no backend system access, but can create and publish blog posts, update calls to action, schedule and publish social media posts, and add keywords for search engine optimization. This is a perfect role for your content marketers.
- Business Analysts will have extensive access to the reporting capabilities of the software. This role tends to fit well for managers to business intelligence teams.
- Blog Authors, as the name suggests, can only write and edit blog posts. They cannot, however, publish these posts on their own. Non-marketing personnel who contributes to your blog, or guest bloggers, will appreciate this functionality.
- Blog Publishers are essentially blog authors, but with publishing rights. Whether you prefer this role or its alternative depends on the security level you're willing to give your blog authors.
We should note that except for Administrators, these roles are only available to professional and enterprise users of the software. Companies on a basic plan can only add users with full access.
3. Understanding Sales User Roles
- Sales Administrators like marketing administrators, have access to all the tools in HubSpot sales and have permissions to add/remove additional sales users.
- Sales Managers have the ability to have the same access as administrators with the exception that they cannot manage users. Here you can also customize their access to things such as the CRM Features and Editing Property Settings.
- Sales Users can also access the different sales tools, but will not have access to set portal defaults.
- Sales Pro Users can access all of the sales tools plus additional Pro tools such as meetings and sequences.
Click here for a handy-dandy chart on all the user roles and their permissions.
4. Setting Custom Permissions
While the above roles serve the needs of smaller businesses, especially larger organizations often need a more customized set of user roles for maximum efficiency and success. Fortunately, HubSpot also allows its clients to modify user roles, enabling you to tailor security levels and permissions to your individual needs.
For example, you can choose to give marketers access only to create and publish new landing pages, but not to create a new blog post. This level of customization enables your organization to make sure that every user on the platform can focus on their individual responsibilities.
5. Introducing New Users to the Software
Finally, don't forget about the way in which you invite new users to the platform. It's an often-overlooked, but one that HubSpot allows you to customize easily.
When adding a new user, make sure to check the 'send welcome email' box to inform them of their access so they receive a confirmation and information for how to login. The importance of effective welcome emails has been well-established for external audiences, but matters just as much for your internal users.
SEE ALSO: How a Hubspot Partner Agency Can Boost Your Revenue
Adding new users to HubSpot, on its face, is a very simple and easy process––though it's a question that comes up almost every week in our world. As you add users, ensure that you remain confident and up-to-date with their security levels and permissions. Following the above steps helps ensure that you keep a clear overview, and use HubSpot to effectively grow your business in a collaborative environment.


 BACK TO ARTICLES


